

How To Adjust Brightness On Windows 10
Some users are reporting being unable to modify the screen effulgence on Windows 10 after applying an update or after upgrading from an older Windows version. Most users study that the screen brightness seems to always remain on max, regardless of the power plan.
This issue might not severely affect the functionality of a PC (since the brightness can likewise exist adapted from the monitor), but laptop users study that their battery lifespan is severely affected by the fact that their machine is constantly running with the maximum effulgence.
If you lot're struggling with this issue, the post-obit methods volition assistance. We have managed to identify a number of potential fixes that take been constructive for other users encountering the same situation. Follow the methods below in society until you discover a fix that manages to resolve your issue.
Method 1: Adjusting the effulgence from Power Options
Most of the time, the issue is the event of a classic instance of brightness settings problems that can be resolved past tweaking some power options settings. Although this bug is as one-time as Windows seven, Microsoft has failed to address it equally of now.
Note: This item method can also exist applied to Windows 7 and Windows 8 to ready the brightness issue.
Hither's a quick guide to fixing the effulgence outcome via Power options:
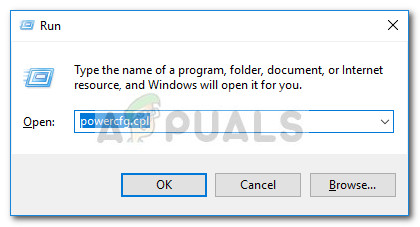
- Press Windows cardinal + R to open up a Run box. And so, blazon "powercfg.cpl" and hit Enter to open the Power Options menu.
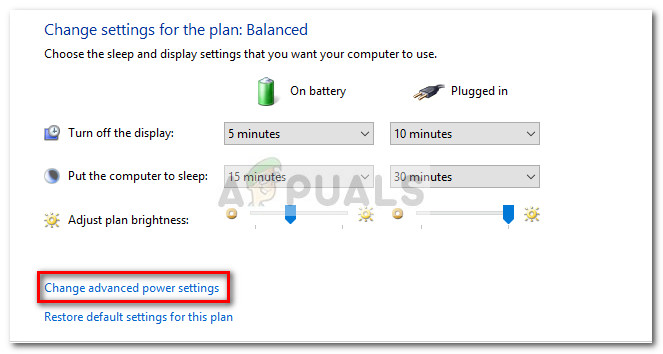
- In the Power Options menu, click on Change plan settings, then click on Change avant-garde ability settings.
- In the next window, scroll down to Display and hit the "+" icon to aggrandize the drop-down carte. Next, aggrandize the Display effulgence menu and manually adapt the values to your liking.
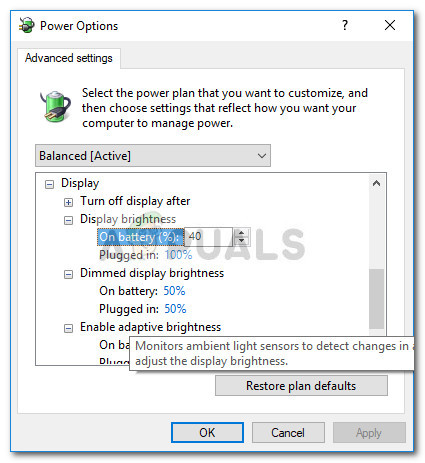
- Repeat the procedure explained at pace 3 with the Dimmed display brightness, then brand certain Enable adaptive effulgence is turned Off.One time all settings are configured to your liking, hit the Apply push button and the screen brightness should be adapted to the values that yous previously set.
If, for some reason, this method didn't work or wasn't applicative, motion down to Method 2.
Method ii: Changing the effulgence options from the Graphics Properties menu
Some other popular resolve for the effulgence issue is to adjust the brightness via the Graphics Backdrop bill of fare. Proceed in heed that this menu is managed by your Graphics card driver and might expect a little different depending on what version you have.
Here'south a quick guide to changing the effulgence from the Graphics properties carte du jour:
Notation: The post-obit steps were done through Intel Graphics and Media Control Panel. Depending on which drivers y'all use, the following screens might look different.
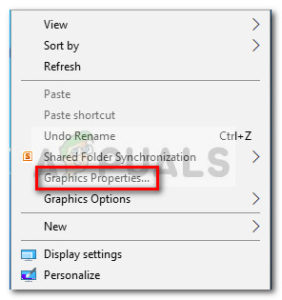
- Right-click anywhere on your desktop and choose Graphics Backdrop.
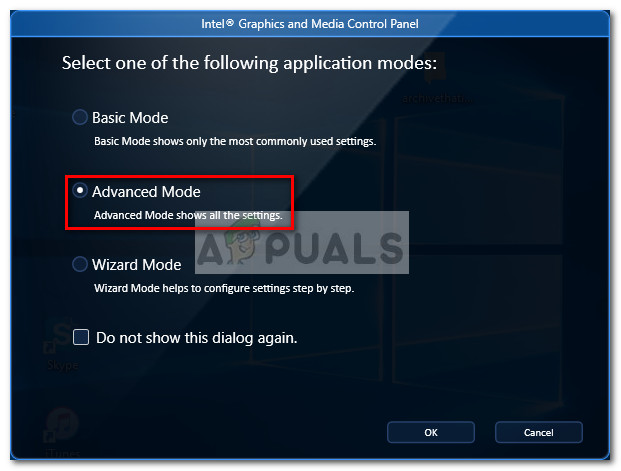
- At the next prompt, choose Advanced Manner and hit the Ok push button.
- Next, aggrandize the Brandish menu and click on Color Enhancement. Then, use the Effulgence slider from the right-hand side to conform the brightness until you lot're satisfied with the result.
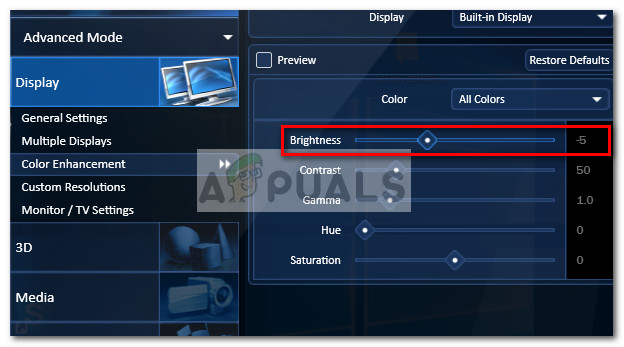
- Finally, striking Employ to relieve your new effulgence setting.
If this method wasn't helpful, move down to Method 3.
Method 3: Updating the GPU drivers
If the first two methods haven't produced a result, the following steps only might. Some users accept reported figuring out that the event was related to their graphics card drivers. Almost of them managed to resolve the outcome for good by uninstalling their GPU drivers.
Follow the guide down beneath for a footstep-by-step guide to updating your GPU drivers in order to resolve the effulgence event on Windows 10:
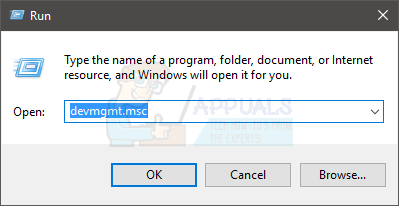
- Press Windows central + R to open up a Run control. Blazon "devmgmt.msc" and hit Enter to open Device Manager.
- In Device Managing director, expand the drib-down menu associated with Display adapters, correct-click on your GPU and choose Update Driver (Update Driver Software).
 Note: Keep in mind that if you're encountering the issue on a laptop, yous'll probable run across two different GPUs nether Brandish Adapters. If that's the case, correct-click on the integrated graphics (in my case it'due south Intel(R) HD Graphics 3000).
 - At the side by side window, click on Search automatically for updated driver software and meet whether the wizard manages to find a new version. If it does, follow the on-screen prompts to install it.
 Note: During this stride, Windows is supposed to utilize your Internet connection to download the latest commuter available. Ensure that you accept a stable internet connection.
 - If Windows manages to find, download and install a new driver version for your integrated GPU carte, reboot your reckoner and run into if you're able to adjust the brightness. In the event that the driver search determines that you have the latest driver already installed or the new driver is producing the same behavior, go along with the other steps below.
- Return to the main screen of Device Manager, right-click on your integrated GPU driver and choose Update drive (Update Commuter Software) once again.
- This fourth dimension, instead of choosing the starting time choice, click on Browse my computer for driver software.

- At the adjacent window, click on Let me pick from a list of bachelor drivers on my figurer.

- Adjacent, bank check the box adjacent to Show uniform hardware, select Microsoft Bones Brandish Adapter and hit the Next push.

- One time the Basic Brandish Adapter driver is installed, restart your figurer once once again. One time your calculator boots back up, your consequence should be resolved.
If yous're still dealing with the issue, motility down to Method four.
Method four: Re-enabling Generic PnP Monitor
As some users have reported, in that location seems to be a Windows ten specific issues that sometimes occurs right after the graphics driver gets installed automatically – either during the upgrading processor via Device Managing director.
As it turns out, something might go wrong which will disable the Generic PnP Monitor (which volition prevent the user from adjusting the screen brightness.
If this is the source of your result, re-enabling the Generic PnP Monitor will promptly resolve the upshot. Here's a quick guide on how to practice this:
- Press Windows key + R to pop open a Run box. Blazon "devmgmt.msc" and hit Enter to open Device Manager.
- In Device Manager, expand the drop-downwardly bill of fare of Monitors, right-click on PnP Monitor and choose Enable Device.

- Reboot your organisation once once more and see if the issue has been resolved and you're able to conform the screen brightness.
If you're still struggling with the issue, motion down to the method below.
Method 5: Updating the dedicated GPU commuter
If all of the above methods have proven to exist a bust, you should turn your attention towards your dedicated graphics carte du jour (if you have one).
It's entirely possible that your dedicated GPU is configured to handle the graphics operations while your PC is not doing stressful activities. Even if the idle manner is ordinarily handled by the integrated GPU solution, a user modification or certain software installations might take forced the dedicated GPU handling the idle mode.
In this case, the solution would be to update the dedicated GPU driver and afterward make sure that the Generic PnP Monitorwas not disabled during the installation process. Hither'due south a quick guide through the whole thing:
- Visit the download page associated with your GPU manufacturer and download the latest driver version according to your GPU model and Windows version. Use this link (here) for ATI and this ane (here) for Nvidia.

- Open the commuter installer and follow the on-screen prompts to update your commuter, so reboot your system once again.
- Once your computer boots back up, let'due south make sure that theGeneric PnP Monitorhas not been disabled during the installation process. To exercise this, open up a Run box (Windows key + R), type "devmgmt.msc" and hit Enter to open Device Manager. Then, expand the drib-down carte of Monitors and brand certain thatGeneric PnP Monitor is enabled. If information technology isn't, correct-click on it and choose Enable device.
- Finally, meet whether this method was effective past trying to adjust the screen brightness. If it nevertheless fails, move over to the method beneath.
Method half-dozen: Changing the Display blazon to Discrete in Bios (Lenovo)
If you've burned through every method in a higher place without a upshot, your issue might be caused by a BIOS setting. Go along in listen that this issue is just reported to occur on Lenovo laptops (specially on Lenovo Thinkpad T400 and older models using the same BIOS versions).
To fix this manufacturer-specific issue, access your BIOS (past pressing F2 during the initial boot), get to the Configuration tab and change the Graphics Device type from Switchable Graphics to Discrete Graphic. Finally, hit F10 to salve your changes and allow your figurer to boot back upwardly.
If this method didn't work or wasn't applicable, move to the final method below.
Method 7: Fixing Catalyst problems via Registry Editor (ATI GPUs)
Every bit some users have pointed out, the screen effulgence upshot might also exist triggered by a known Catalyst bug (particularly with version xv.7.1). Whenever this bug occurs, users are prevented from controlling the brightness.
If y'all're using an ATI graphics card and you lot have Catalyst installed, follow the steps below and see if they manage to resolve your issue:
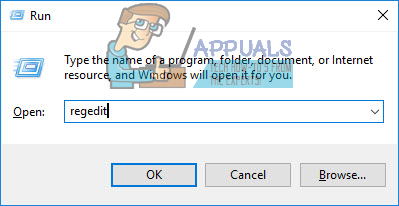
- Press Windows central + R to open up a run command. Type "regedit" and striking Enter to open up Registry Editor.
- In Registry Editor, navigate to the following key:
HKEY_LOCAL_MACHINE \ Organisation \ ControlSet001 \ Control\Form \ {4d36e968-e325-11ce-bfc1-08002be10318} \ 0000 - Double click onMD_EnableBrightnesslf2 and set the Value to 0. And then, repeat the same procedure withKMD_EnableBrightnessInterface2.
- Next, navigate to the post-obit key:
HKEY_LOCAL_MACHINE \ SYSTEM \ CurrentControlSet \ Control \ Grade \{4d36e968-e325-11ce-bfc1-08002be10318} \ 0001 - Aforementioned deal every bit before, double-clickMD_EnableBrightnesslf2andKMD_EnableBrightnessInterface2to set their valuses to 0.
- Close Registry Editor and reboot your figurer. Subsequently the next startup is finished, the screen effulgence outcome should be resolved and you should be able to command it.
![]()

How To Adjust Brightness On Windows 10,
Source: https://appuals.com/fix-windows-10-brightness-wont-change/
Posted by: offuttlity1983.blogspot.com
0 Response to "How To Adjust Brightness On Windows 10"
Post a Comment